This guide covers the two branding layers that are easiest to confuse:
- Brand guidelines shape what the model generates.
- Branding overlays and logos shape how the approved result is finished afterwards.
Keeping that distinction explicit is what makes the workflow feel intentional instead of bolted on.
What you’ll learn
- Which exact brand-system values were used in the live walkthrough
- Where the
Apply brand guidelinesswitch appears before generation - How the post-generation branding editor becomes the review point after preview is already approved
- How the final export reflects the approved editor treatment
Before you start
- Open Settings -> Brand
- Keep one logo file ready
- Keep one layout overlay file ready
- Open Generate in a second tab for the prompt-side comparison
Fill the brand panel with literal values instead of vague brand language
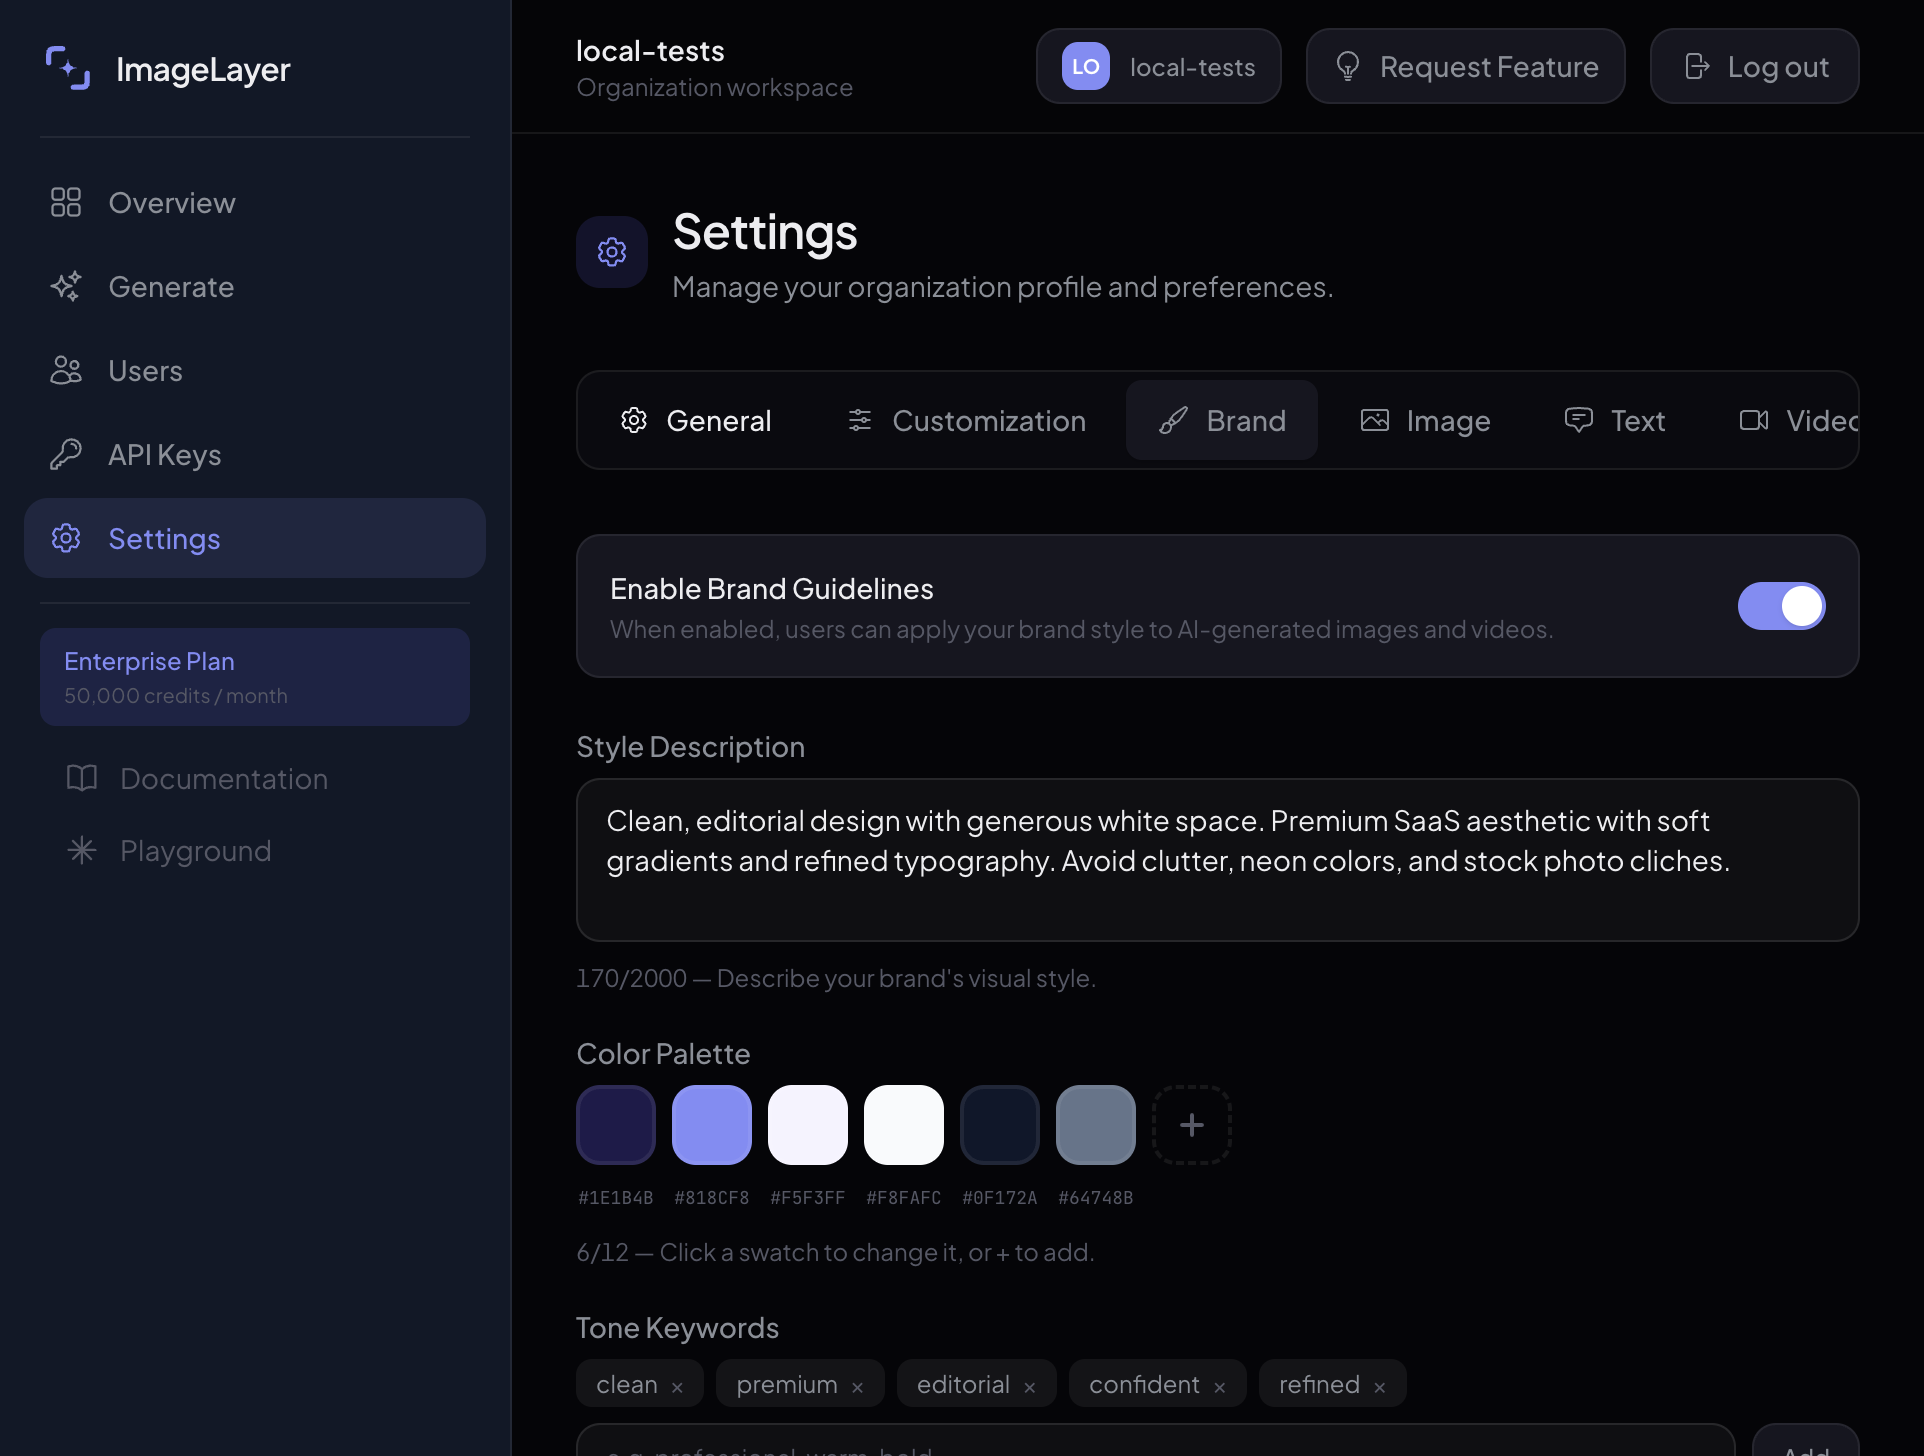
Open Settings -> Brand and save the same values used in this walkthrough.
- Turn on
Enable Brand Guidelines. - Paste this into
Style Description:Clean, editorial design with generous white space. Premium SaaS aesthetic with soft gradients and refined typography. Avoid clutter, neon colors, and stock photo cliches. - Set
Color Paletteto#1E1B4B,#818CF8,#F5F3FF,#F8FAFC,#0F172A, and#64748B. - Add
Tone Keywords:clean,premium,editorial,confident,refined. - Add
Avoid Elements:neon colors,stock photo cliches,cluttered layouts, andheavy drop shadows. - Further down the panel, set
Gradient StyletoMesh, keep the three gradient colors as#F5F3FF,#818CF8, and#1E1B4B, setBackground MoodtoEditorial, setDepth ElementstoNoise texture, setBrand Motiftosoft aurora gradient ribbon, setBrandmark TexttoImageLayer, and setCustom Prompt SuffixtoKeep compositions clean, premium, product-led, and presentation-ready. - Click
Save Brand Guidelines.
Expected result
The organization now has a reusable brand system that changes the model input before any overlay or logo is added later.
Turn on Apply brand guidelines before you generate
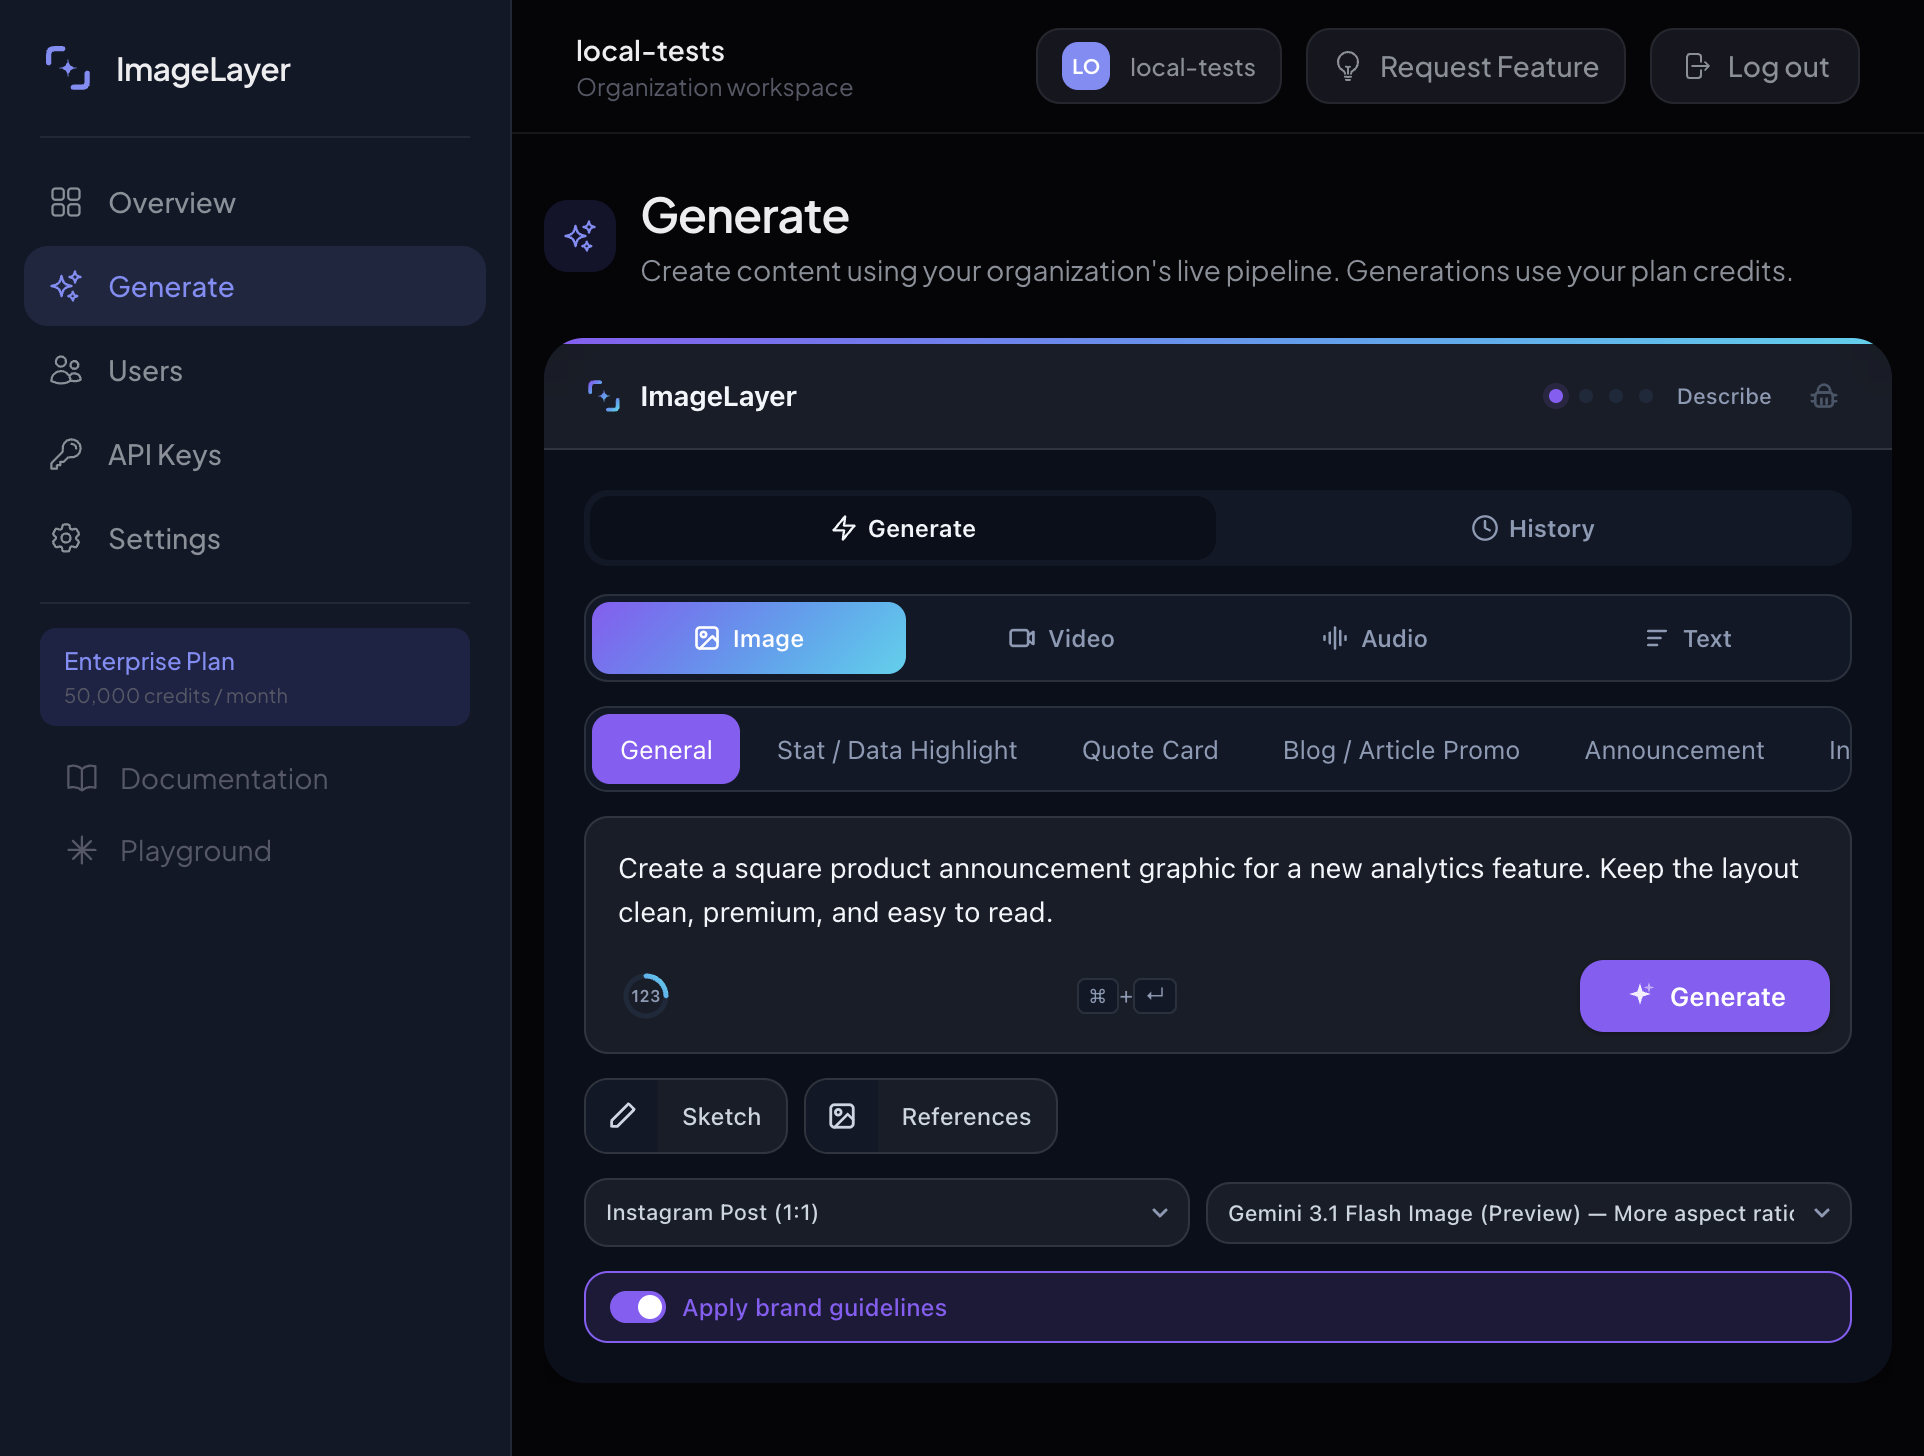
Return to Generate, stay in Image mode, and switch on Apply brand guidelines before submitting the prompt.
Create a square product announcement graphic for a new analytics feature. Keep the layout clean, premium, and easy to read.- Keep
Generalselected. - Turn on
Apply brand guidelines. - Use the prompt above as the starting point for the branded walkthrough before you move into the editor.
- Click
Generate.
Expected result
The raw generated image should already move closer to the saved brand system before any finishing treatment is added.
After preview, move into the branding editor and review the approved image
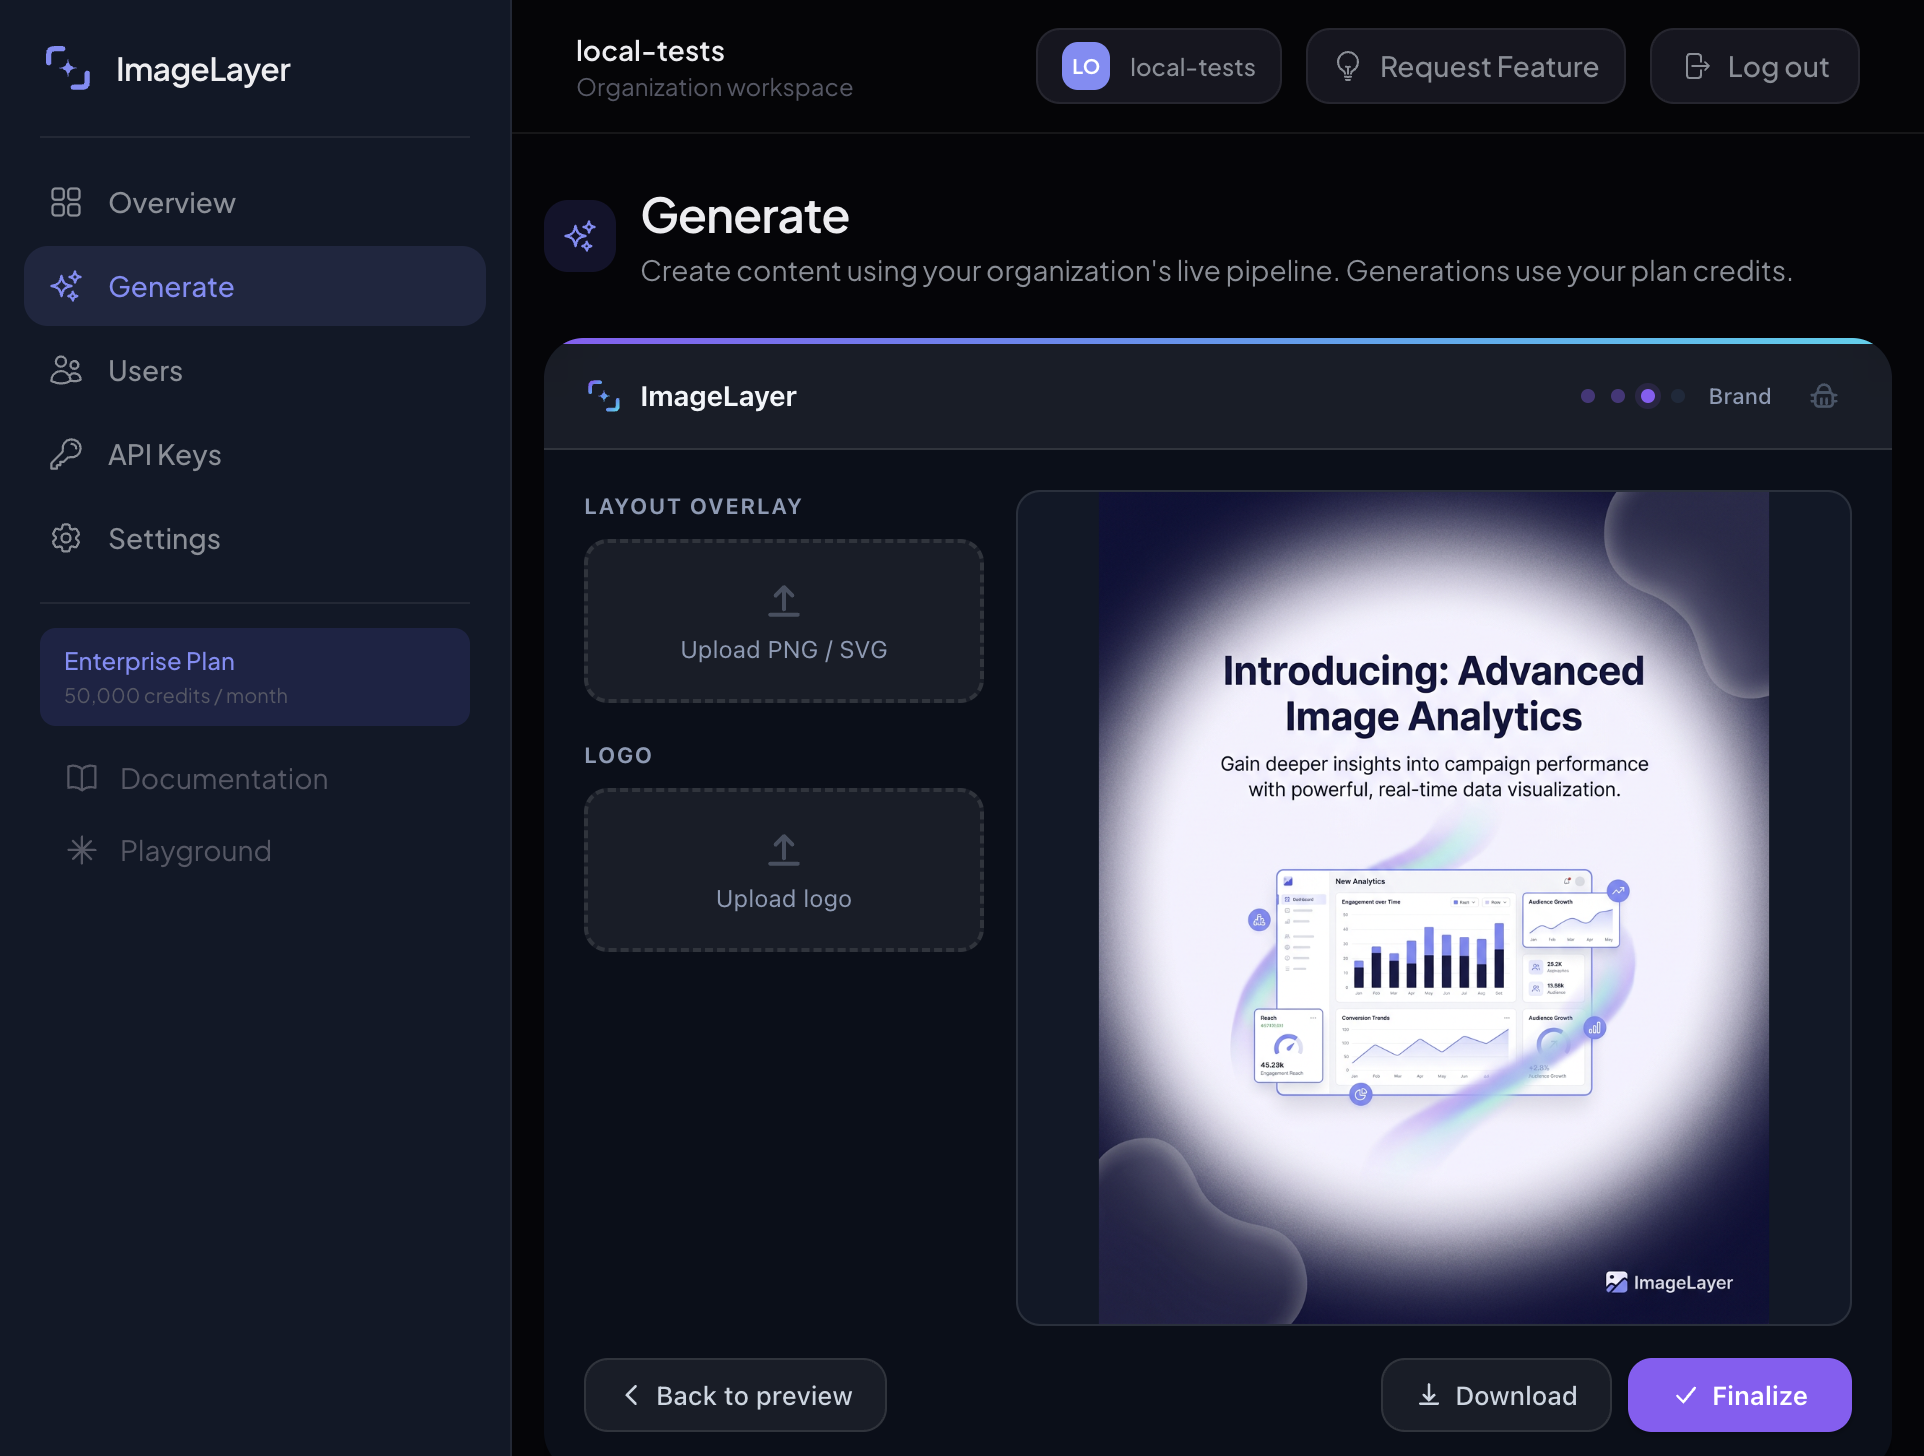
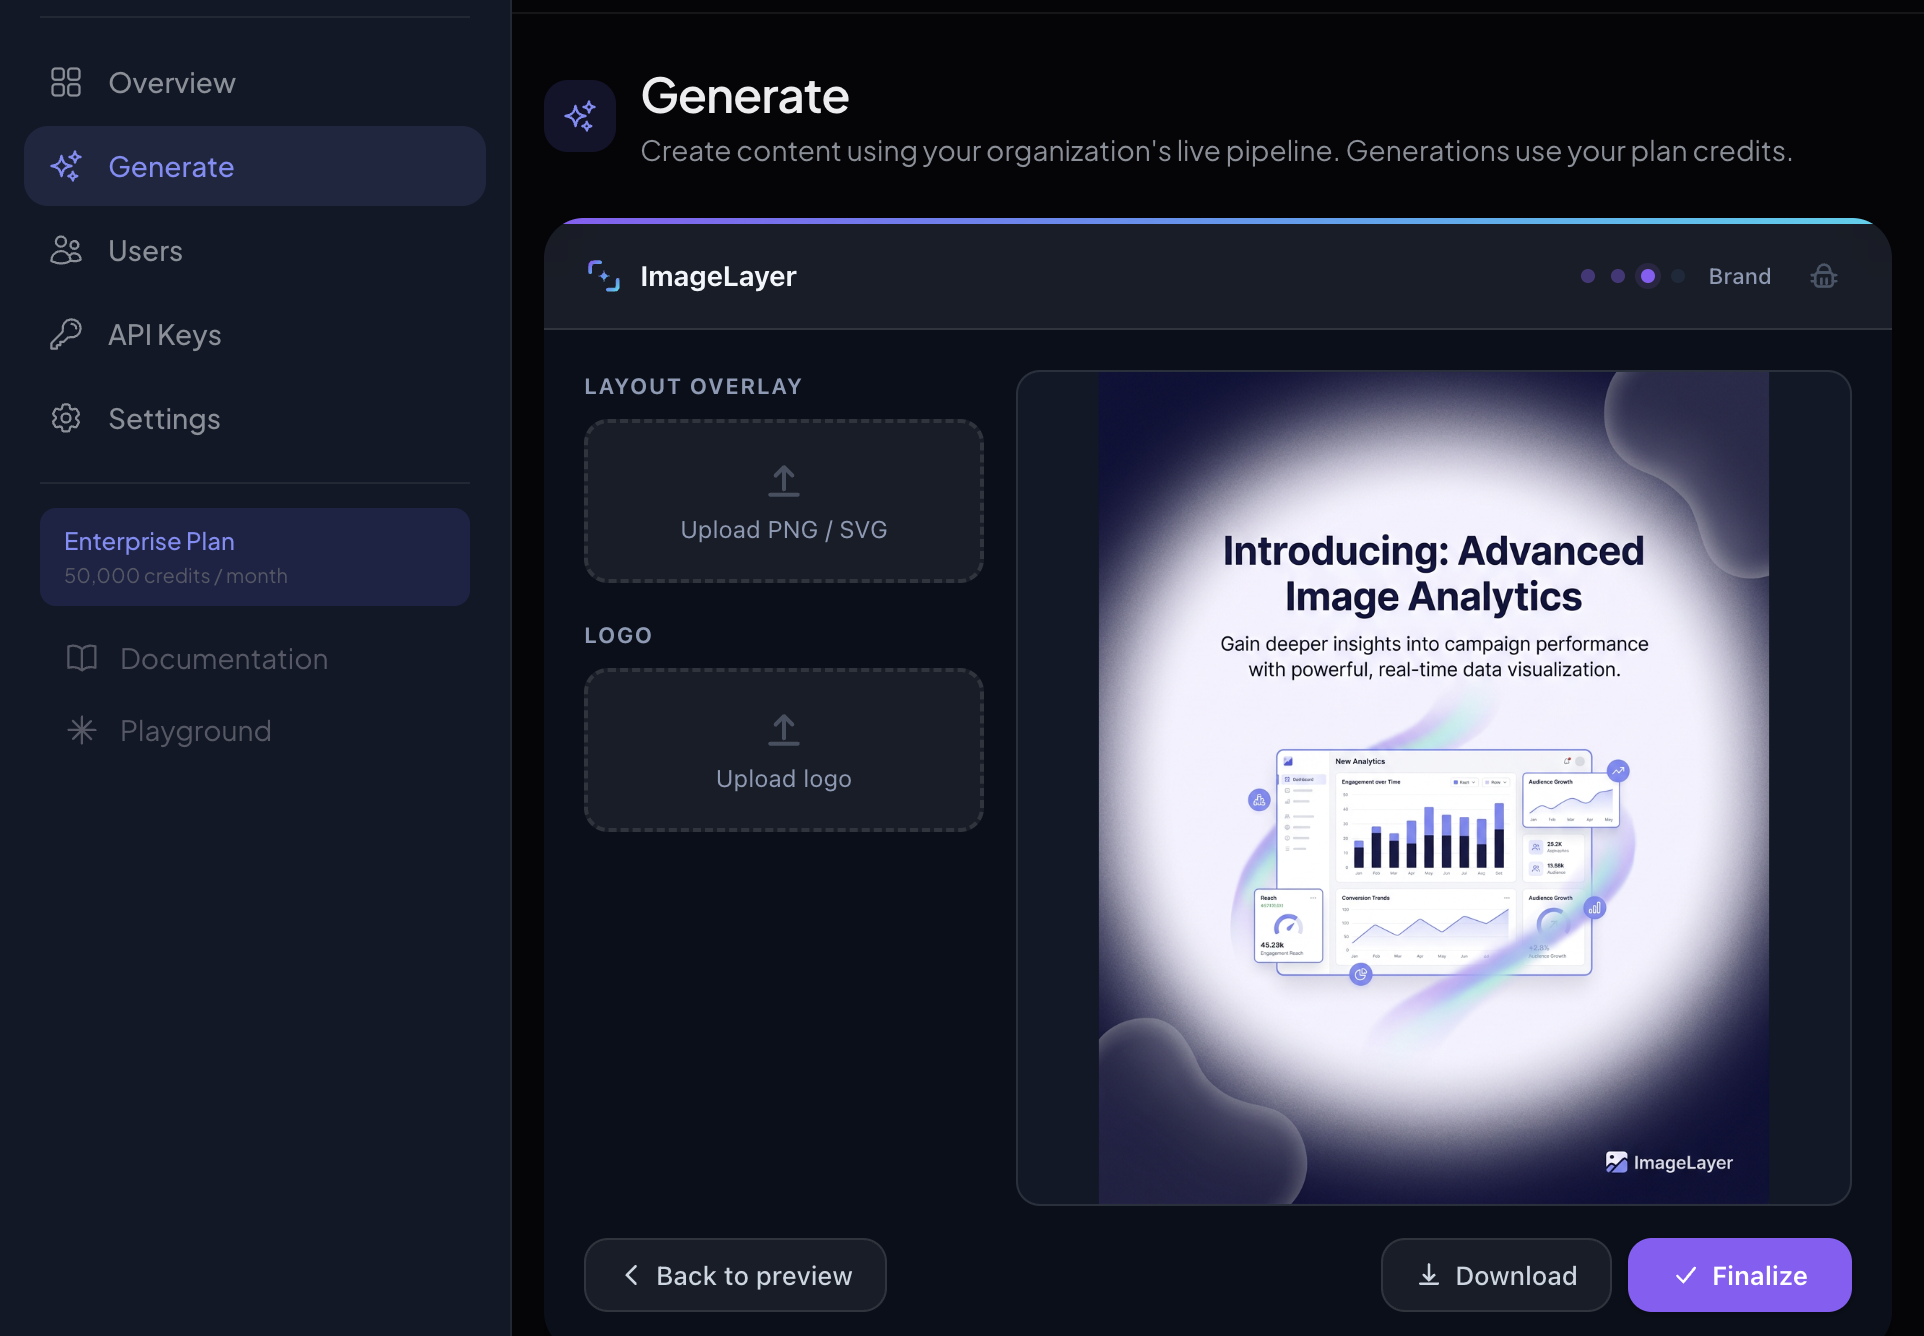
Once the brand-guided image looks strong in preview, click Brand it and move into the editor.
- Review the approved image on the canvas before adding anything else.
- If you want a separate layout file, use
Upload PNG / SVGunderLayout overlay. - Keep the base image readable. Extra finishing layers should frame the result, not rescue a weak composition.
- Use
Back to previewif the raw generation still needs work.
Expected result
The team can inspect the approved image inside the editor and decide whether the base branded result is already strong enough to export.
Finalize the branded export once the canvas looks right
Once the branded version looks right on canvas, finalize the export from the same editor state.
- Review the canvas one last time before export.
- If your team wants an extra logo layer, add it before finalizing and confirm it visually on canvas.
- Click
FinalizeorDownloadwhen the approved treatment is ready to export.
Expected result
The final export carries the approved branded treatment from the editor review.
Branded sample output
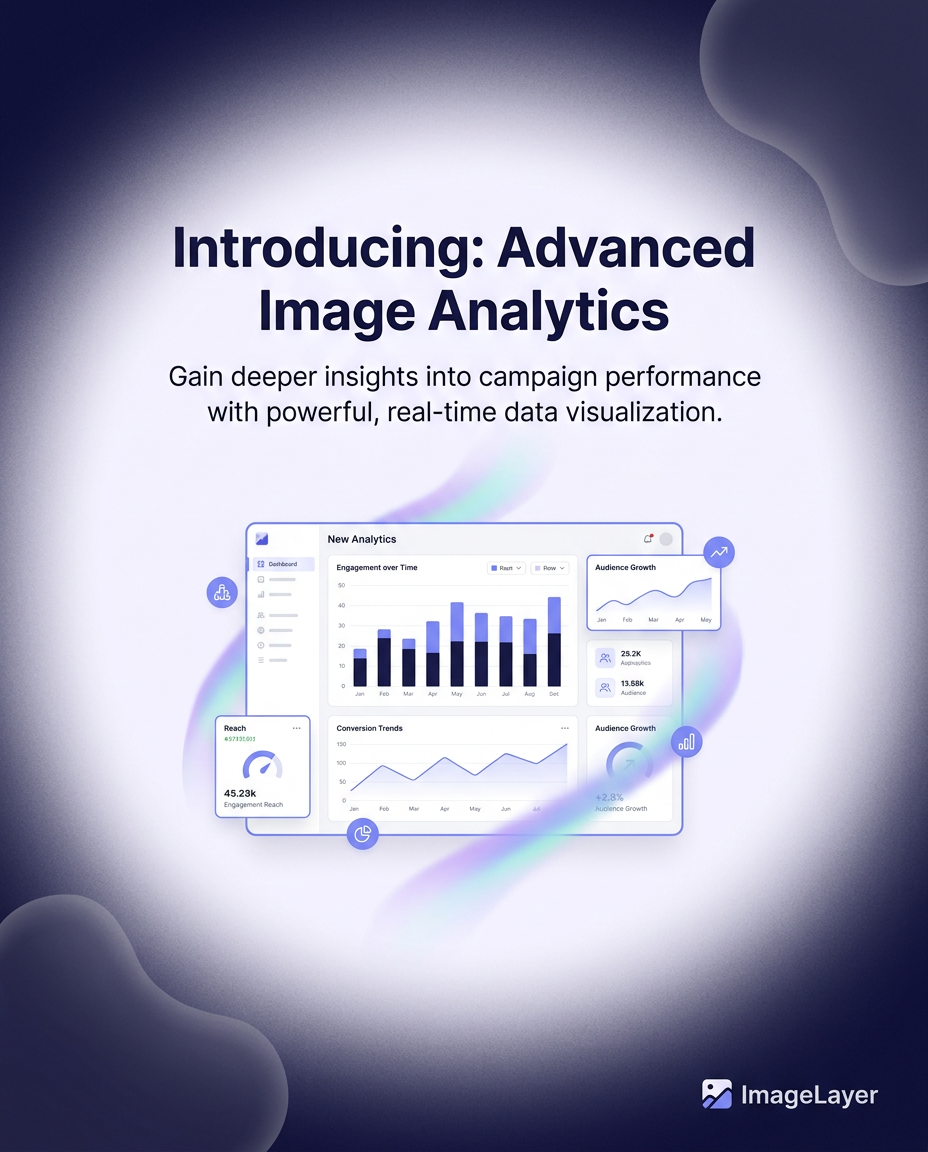
This final export shows the branded treatment used for the walkthrough after the editor review above.
How brand guidelines apply to video
Video models (Veo) are far more literal about prompt text than image models. Words like “color”, “primary”, “headline”, quoted brandmark text, and hex codes can be rendered as floating captions on the generated video. To prevent that, the video pipeline assembles a sanitized brand prompt:
- Hex codes and color names (red, navy, charcoal, etc.) are stripped from
Style Description,Brand Motif,Custom Suffix,Tone Keywords, andAvoid Elementsbefore the prompt reaches Veo. Colors are conveyed only through the structured palette as abstract visual phrases (e.g. “deep cool accent”) so the model paints them without writing them. Typographyhints are not sent to video — they only apply to image generation, where rendered text is acceptable.- The
Brandmarkis image-only by default. Use the newApply tocontrol next to the brandmark fields to opt the wordmark intoVideoorImage + video. Even when opted in, the instruction is reformulated so it describes a subtle integrated wordmark instead of a literal “Place X in the corner” command. - The user prompt itself is never sanitized. If you legitimately want text on the video (for example a “SALE 50%” promo), put that in the prompt and it will be rendered.
- When a brand logo has been extracted, the operator can additionally enable image-to-video conditioning (env
BRAND_LOGO_TO_VIDEO=true) so Veo uses the logo as a visual anchor for brand identity instead of relying on prompt words.
If the dashboard shows a warning under Custom Suffix or after extraction that color terms were found, rephrase the entry to describe layout, lighting, materials, or mood instead. Color information lives in the palette only.
Best practices for customer teams
- Save one stable brand system before letting every operator improvise their own values
- Use overlays for framing and polish, not for hiding weak raw generations
- Compare brand-guided and non-guided outputs if the customer questions what the saved system is doing
- Standardize one approved logo placement rule per brand workflow
What to read next
- Getting Started for the full path from prompt to final asset
- Image Generation for the freeform controls that happen before branding
- Docs for the underlying widget configuration and event details