Templates are the fastest way to make repeatable graphics operational. Instead of asking every operator to invent a full prompt, the widget collects the few inputs that matter and assembles the rest behind the scenes.
What you’ll learn
- When to switch from
Generalto a structured content type - Which literal values were used in the stat-card example below
- How
Platform presetworks with a template instead of replacing it - Why templates are easier to scale across teams than freeform prompting
Best fit for templates
- Social teams creating recurring announcements or stat cards
- Marketing teams that need consistent output quality across many operators
- Internal comms teams producing the same type of visual every week
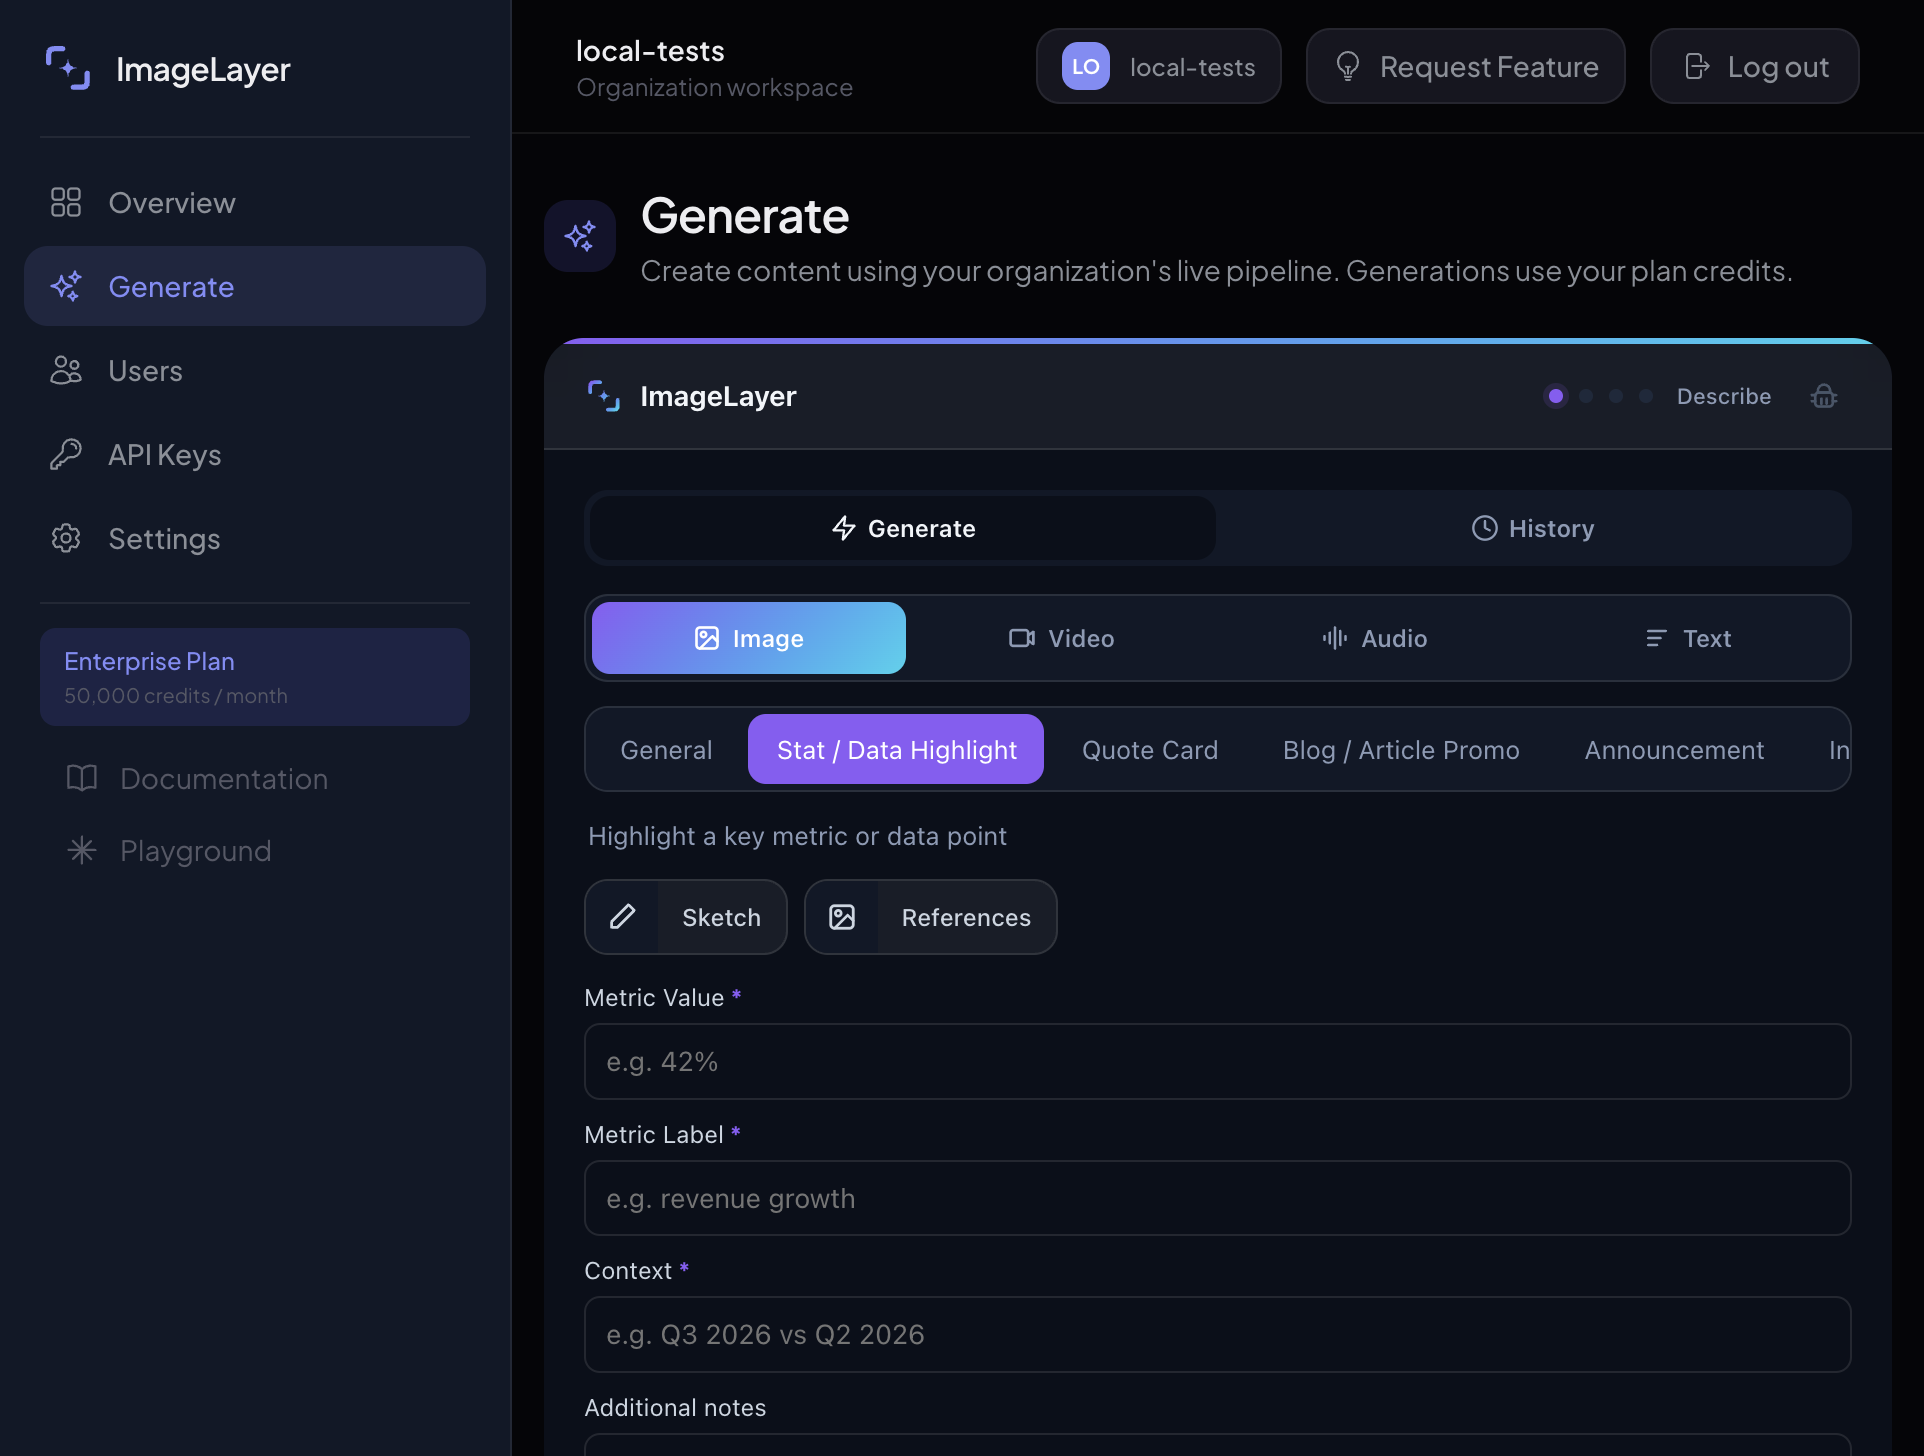
Switch from General to Stat / Data Highlight
Stay in Image mode, then move from General to Stat / Data Highlight.
- Use templates when consistency matters more than open-ended exploration.
Stat / Data Highlightis a strong first example because it is easy to explain and easy to judge.- The moment you leave
General, the widget starts asking for structured inputs instead of one large brief.
Expected result
The user sees purpose-built fields instead of a single open-ended prompt box.
Enter literal values into each template field
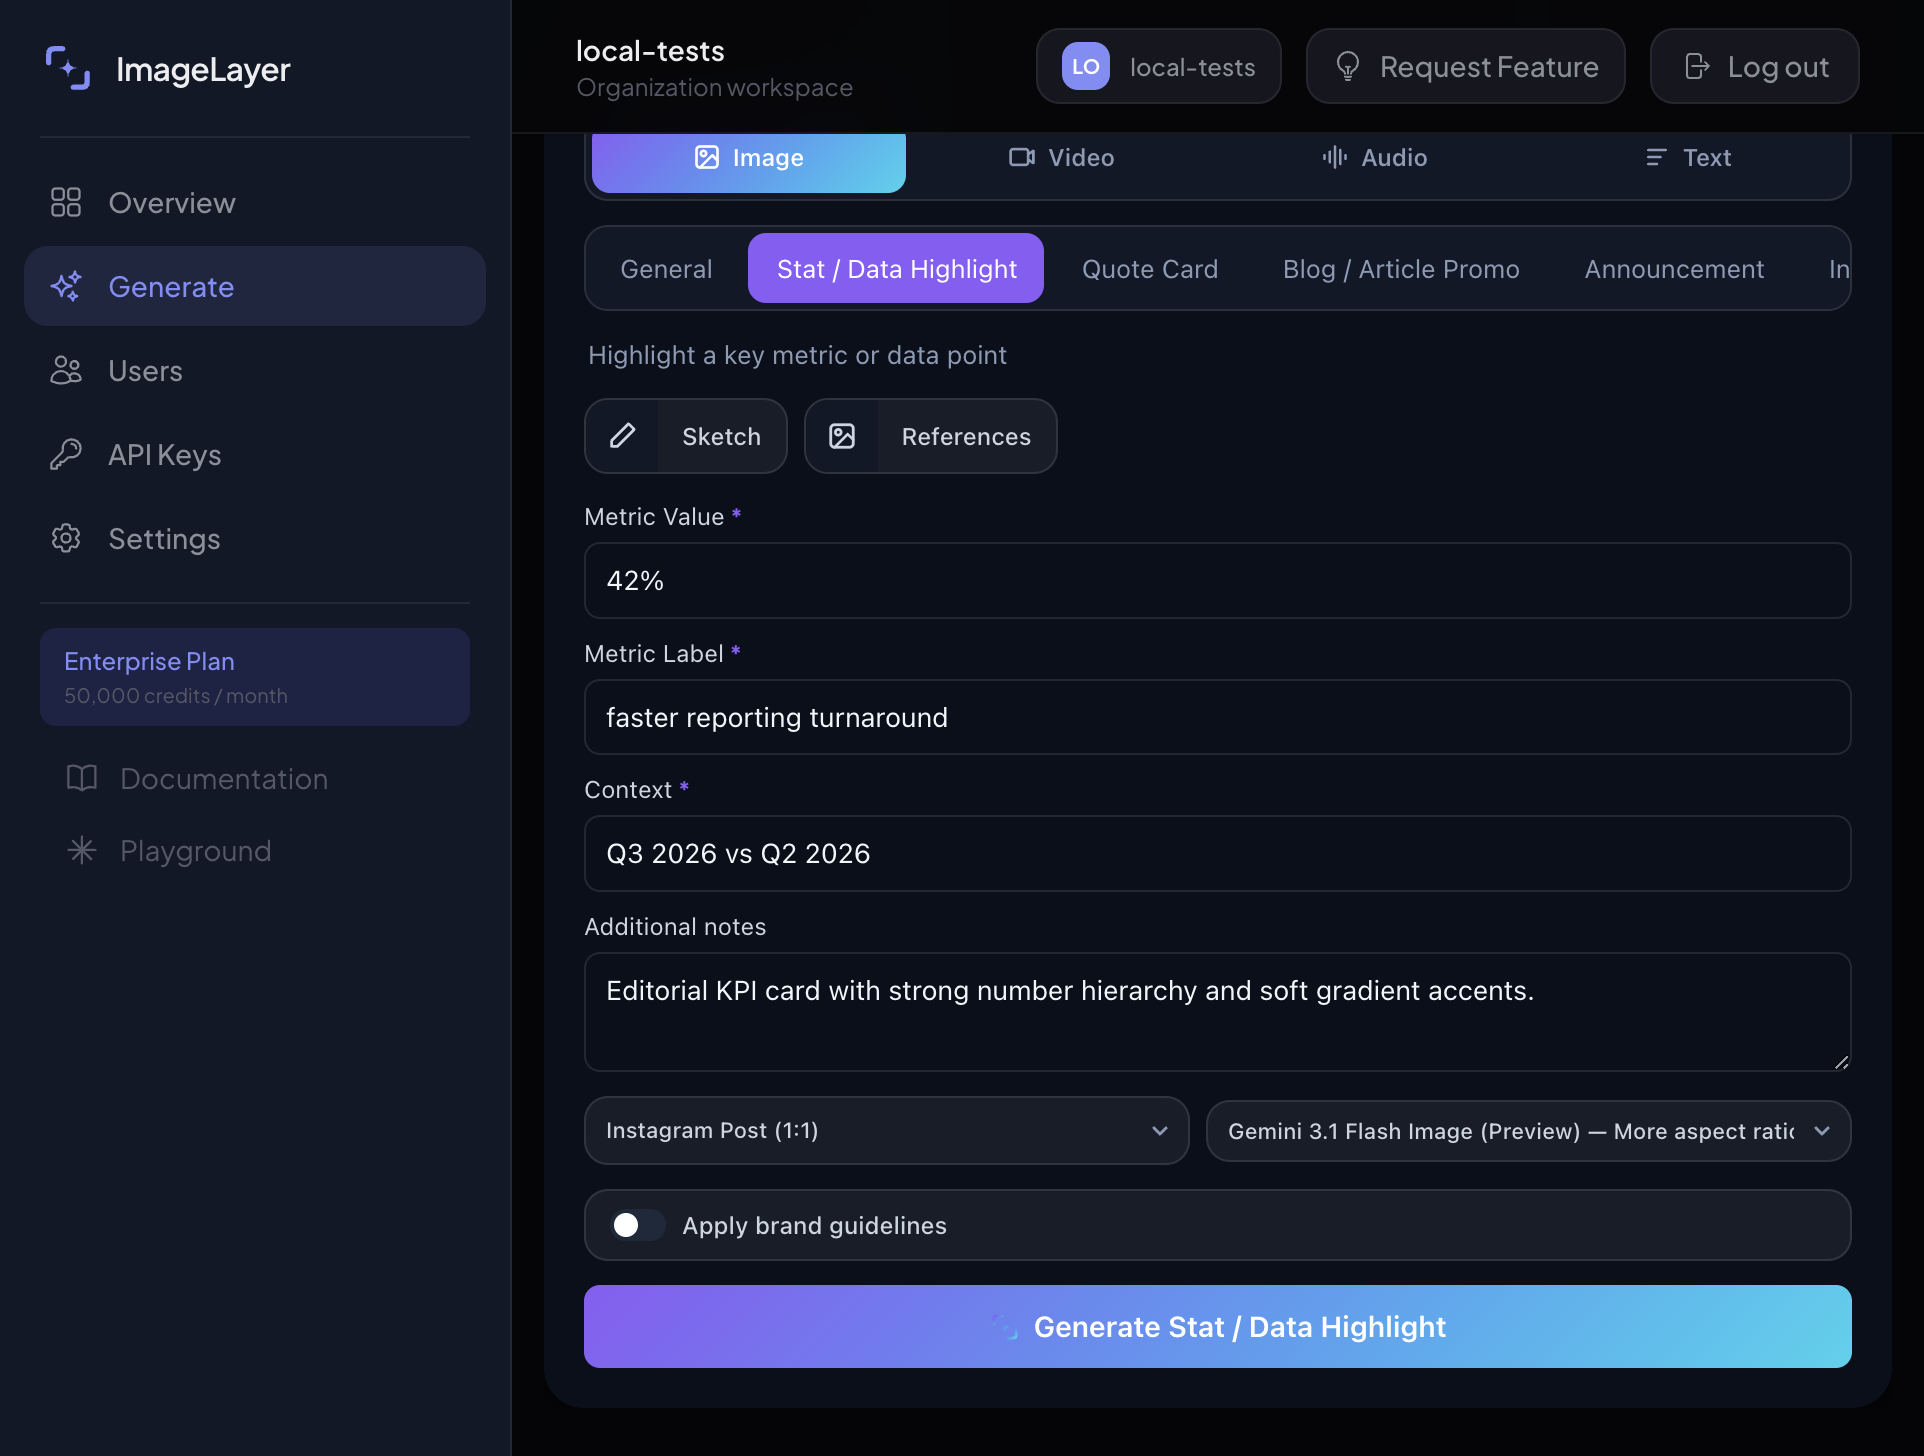
Fill the fields exactly like this:
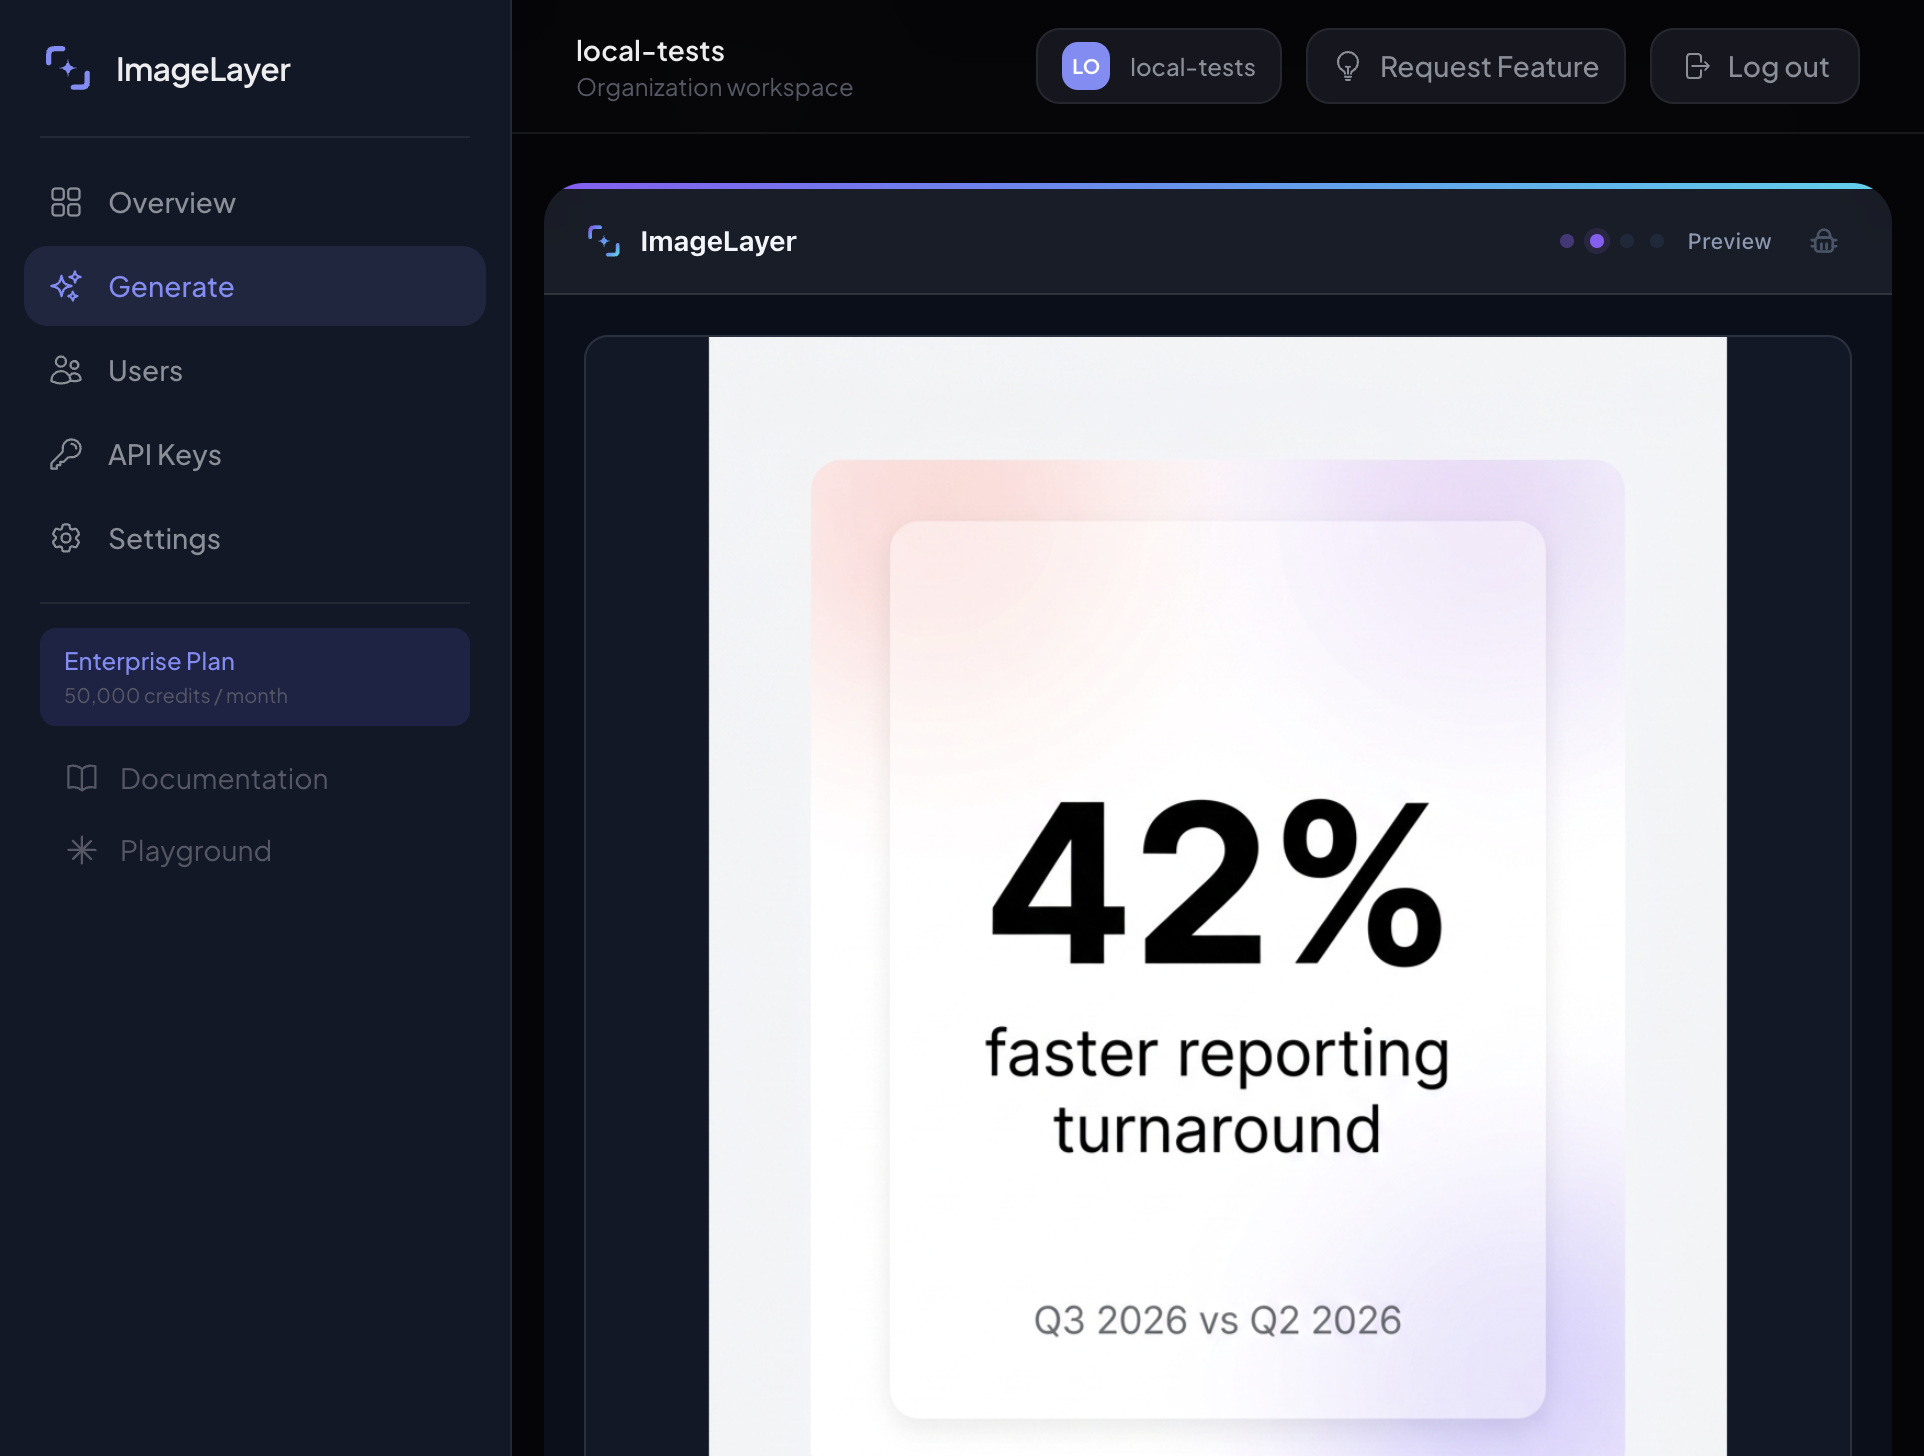
Metric Value: 42%
Metric Label: faster reporting turnaround
Context: Q3 2026 vs Q2 2026
Additional notes: Editorial KPI card with strong number hierarchy and soft gradient accents.- Write for meaning, not cleverness.
- Keep the values short enough to fit cleanly in a graphic.
- Notice that the submit button becomes
Generate Stat / Data Highlight. - Leave
Apply brand guidelinesoff for this isolated template demo.
Expected result
The widget can assemble a strong prompt behind the scenes without asking the user to write one manually.
Pair the template with LinkedIn Post (4:5)
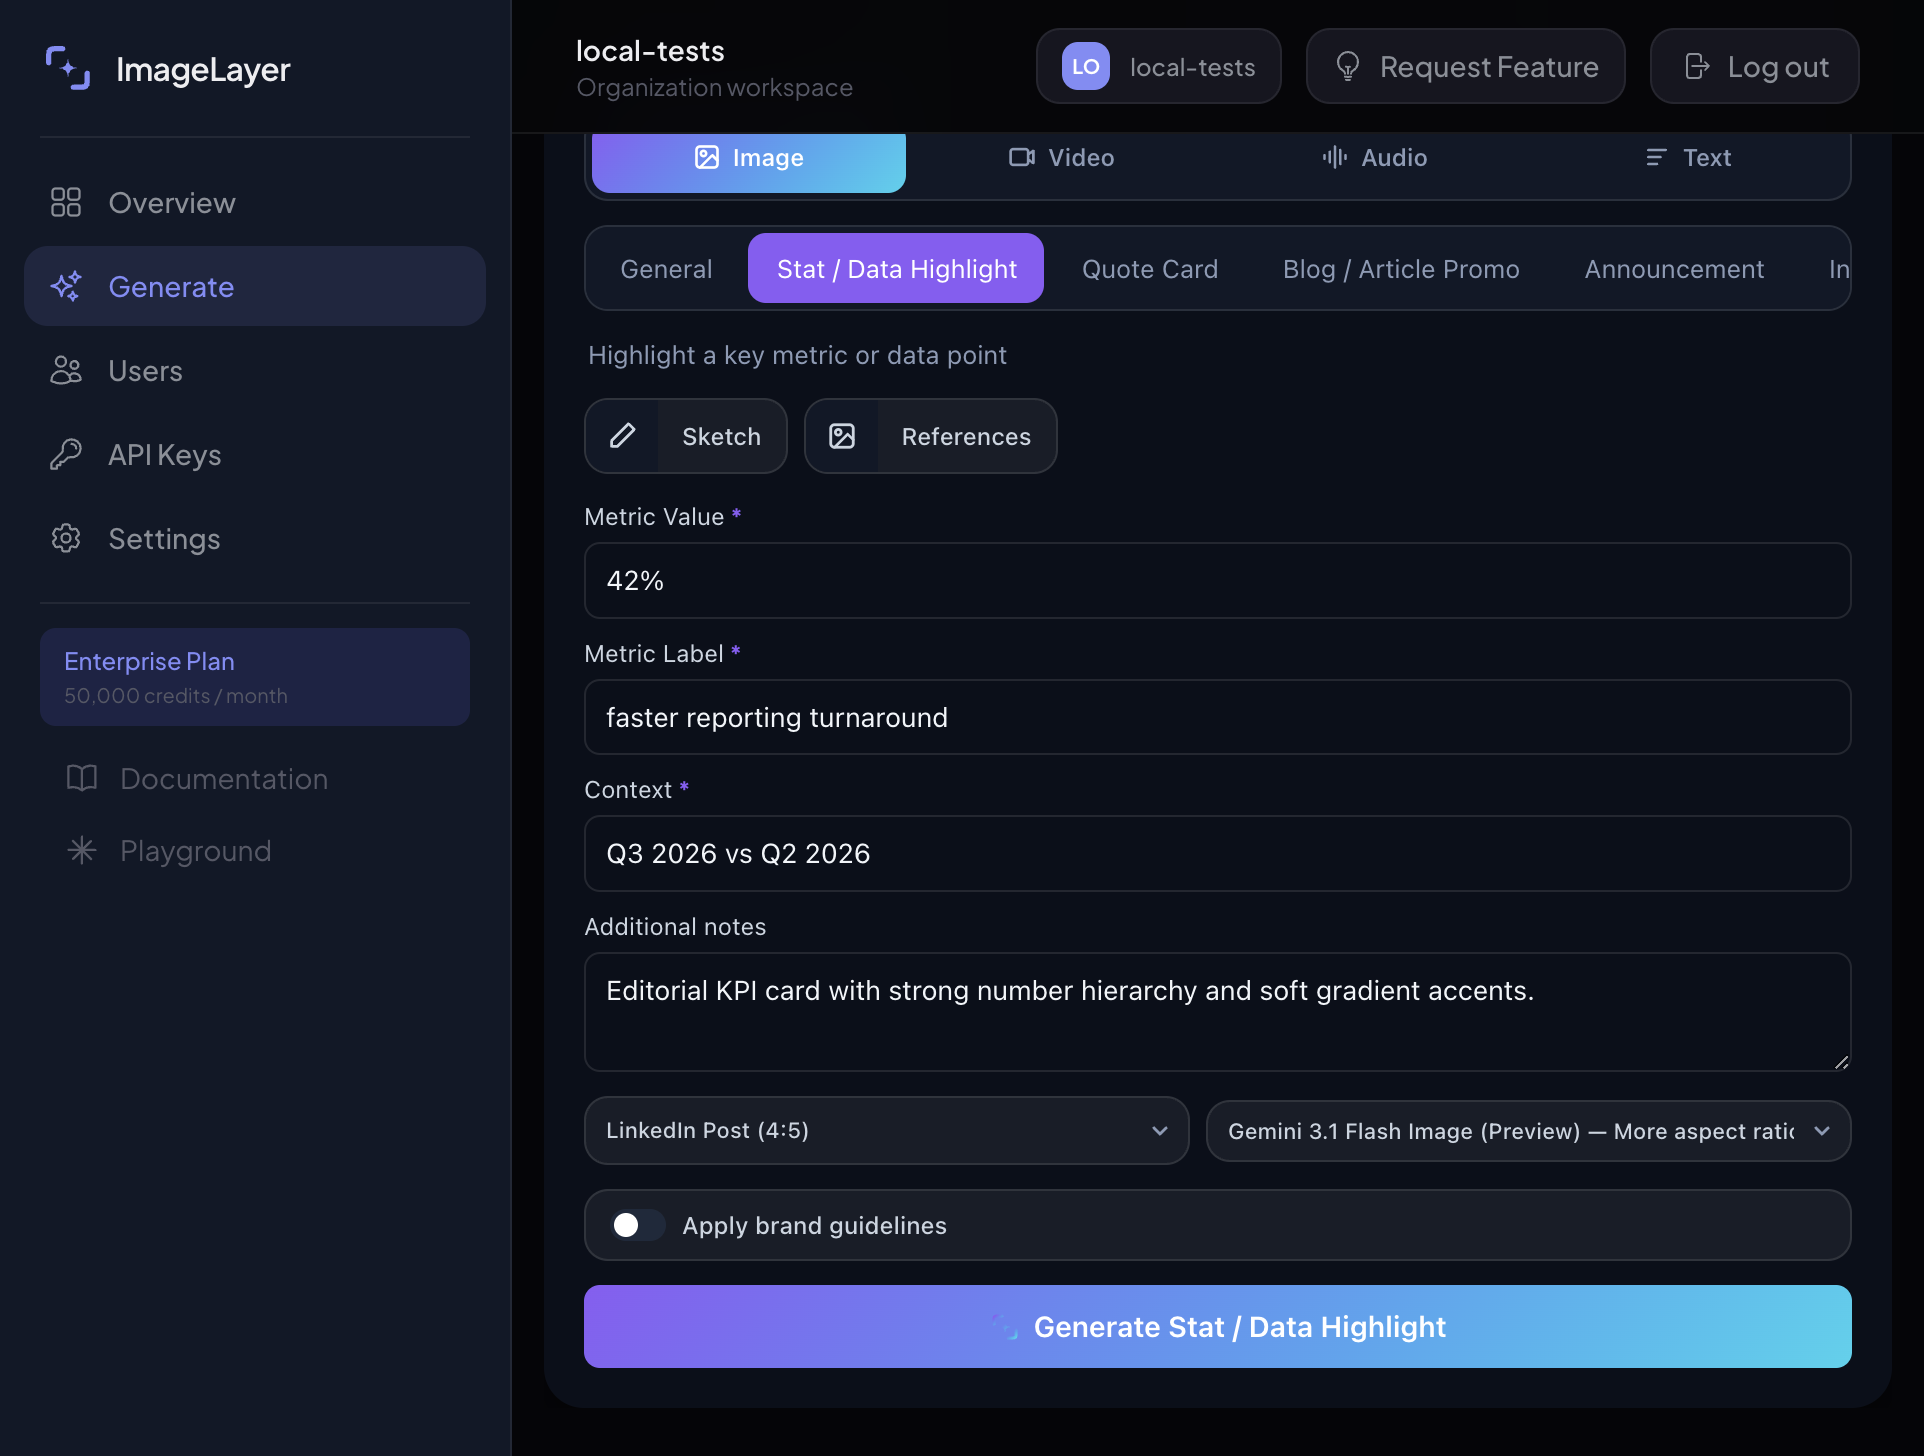
After the fields are filled, set Platform preset to LinkedIn Post (4:5) so the output matches the portrait result shown at the end of this guide.
- Keep one default preset per template use case whenever possible.
- Reuse the same template across multiple presets only after the base workflow is stable.
- Do not confuse the content structure with the publishing format. They solve different problems.
Expected result
The generated stat card is both structurally correct and sized for the same 4:5 publishing surface shown in the screenshot.
Review the output and reuse the same structure for the next operator
Once the preview looks right, the value of the template workflow becomes obvious: the next person can fill the same form and get a similarly stable result.
- Standardize one or two templates first before expanding the full library.
- Keep the field names customer-facing and outcome-oriented.
- Add overlays or logos only after the core template result is already approved.
Expected result
The team can ship more consistent visuals with less prompting skill and fewer support questions.
Sample template output
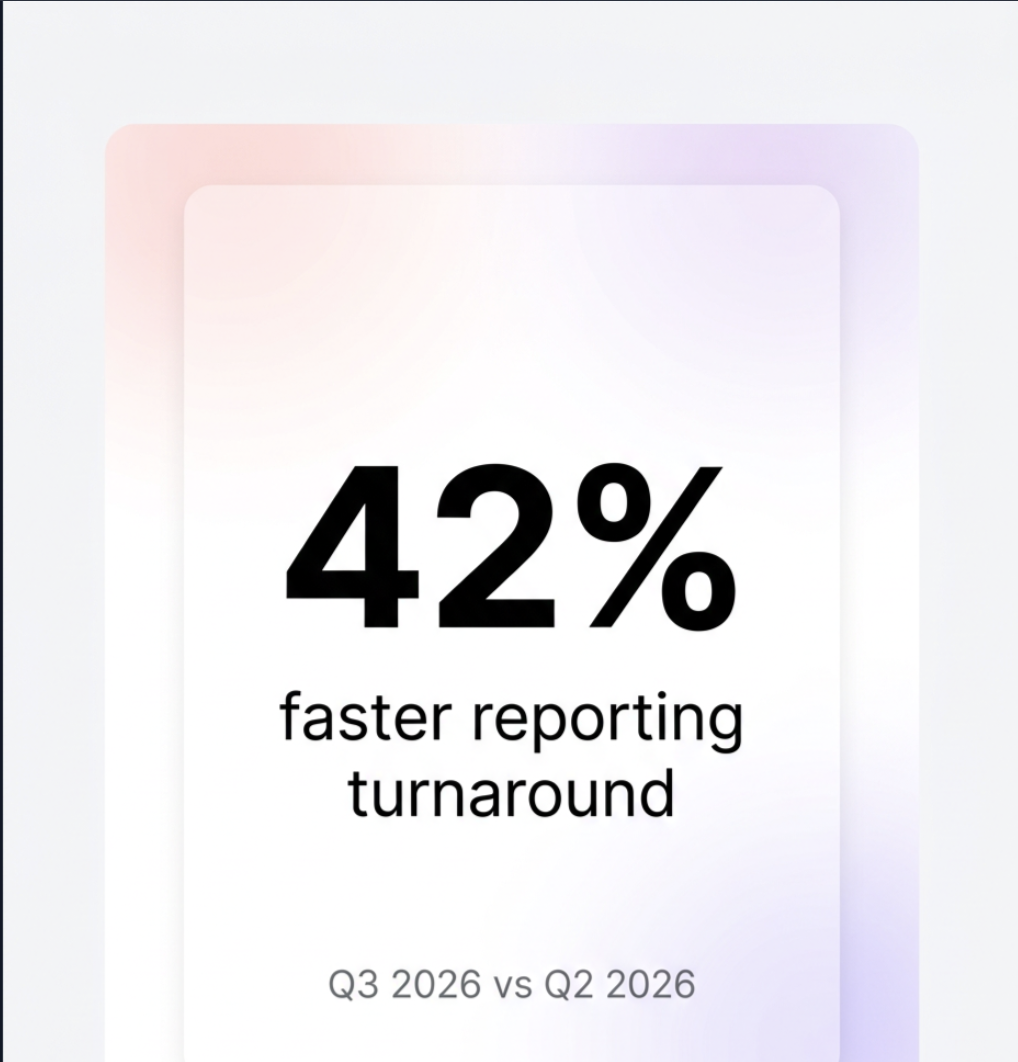
This saved result is the same stat highlight shown in the preview above, so the guide shows exactly what the structured workflow produced.
Keep template examples additive
The Stat / Data Highlight walkthrough above is still the baseline template example. Keep its screenshots, field values, and generated result intact so teams can see how the default template flow behaves before they compare premium model behavior.
When you add GPT Image 2 examples to a template guide, add them as a second run instead of rewriting the first one. The useful comparison is:
- default Gemini / Nano Banana-style run: fast baseline, good for broad visual exploration and standard branded template output
- GPT Image 2 run: premium pass for exact text, denser typography, labels, product packaging, UI copy, and fewer reruns on text-heavy assets
For every added example, document the model, content type, platform preset, brand-guidelines state, exact field values, and the generated result.
How GPT Image 2 changes templates
GPT Image 2 makes text-led templates more useful because the generated image can carry real words: stat values, event dates, short offer lines, UI labels, packaging text, and step labels.
That does not mean templates should collect more copy. It means templates should collect shorter, more exact copy.
When building or editing a template for GPT Image 2:
- keep each rendered text field short enough to fit without shrinking
- wrap exact copy in quotes inside the prompt template
- name where the text appears, such as upper third, lower-left, centered, or inside a badge
- specify the typography role, such as headline, supporting line, caption, or label
- add constraints that block extra words, duplicate text, hallucinated logos, and decorative fine print
Example template language:
Hero headline: "{{headline}}" rendered exactly once in bold geometric sans-serif type, upper-left.
Supporting line: "{{supporting_line}}" directly beneath at one-third the headline size.
Constraints: render quoted text verbatim, no extra words, no duplicate text, no fake logos, no watermark.
For image-editing templates, use a preserve block:
Change: {{change_request}}.
Preserve: product geometry, visible text, camera angle, crop, lighting, and layout from the reference image.
Constraints: no redesign, no added claims, no logo drift, no watermark.
The template should protect the output from the user’s shortest possible input.
Template-first recommendations
- Start with the assets your customer already makes manually every week
- Pair each template with one default preset and one fallback preset
- Keep field instructions literal so non-designers can succeed on the first try
- Use freeform image mode only when the request no longer fits a repeatable pattern
What to read next
- Getting Started for the full default widget flow
- Image Generation for open-ended visual requests
- Branding & Guidelines for finishing template outputs with overlays and logos
- GPT Image 2 Playbook for prompt patterns you can turn into fields